Brewery Pet Carrier Comparison And Winery-Friendly Picks
17th May•13 min read
If your cat or dog requires daily insulin injections, a standard pet carrier won't cut it. A diabetes-friendly pet carrier must do two jobs simultaneously: contain your pet reliably during travel and protect temperature-sensitive medications that lose potency outside a narrow thermal window. Most carriers fail at one or both. This guide breaks down what separates a robust, temperature-stable design from one that will strand you at the airport with a useless container (or worse, a spoiled insulin supply).
I've watched carriers come undone under real stress. Once tested a bargain model after an owner's terrier managed to blow a zipper mid-bus ride. Under tension, the coil teeth skipped, the seam tape peeled, and the mesh laddered. The insulin was intact, but the carrier wasn't. That failure wasn't random, it was inevitable. Weak points fail where stress naturally travels first.
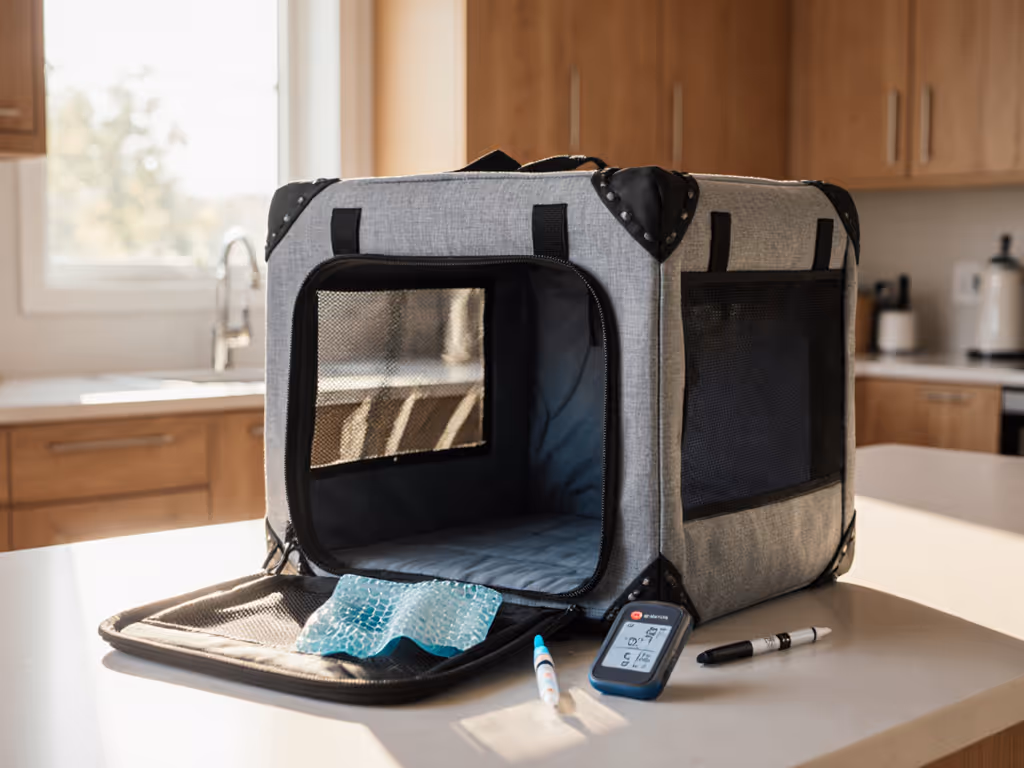
Insulin degrades if exposed to temperatures below 2°C or above 28°C (36-82°F). Most travel happens in vehicle cabins, airport terminals, and transit vehicles where ambient temperature swings wildly. A carrier sitting in a parked car in direct sun can exceed 50°C in minutes. A cold airport shuttle at 5 AM may dip to freezing. Your insulin-stable pet carrier must buffer these swings. For the science behind heat transfer in fabrics and foams, see our carrier temperature regulation guide.
Many carriers marketed as "insulated" rely on a thin foam or mylar layer, often just 0.25 inches thick. That's decorative, not functional. Functional insulation requires:
Many high-insulation carriers sacrifice ventilation mesh, replacing it with solid plastic panels. This creates a thermal advantage but an airflow nightmare. Your diabetic pet panting in a sealed box isn't cooler, it's stressed and generating more metabolic heat. The mesh must be durable enough to withstand clawing and chewing (a stress response in anxious pets) while allowing air exchange. Dive deeper into airflow mechanics in our pet carrier ventilation science guide.
A: Zippers are failure point zero. A test I use repeatedly:
Low-grade coil zippers (common in carriers under $60) fail test 2. Reverse-coil and bar-tack designs pass. Bar-tacks (reinforced stitching patches at zipper endpoints) prevent blowouts. If a carrier's specifications don't mention bar-tacks or reverse-coil design, assume standard coil. Standard coil will fail.
A: Not all mesh is equal. Three variables:
Denier (thickness): Higher denier = stronger. Look for at least 600D polyester or nylon in primary load-bearing sides. Belly panels can be 300D, but don't accept less than 600D on sides facing forward motion.
Weave tightness: Tight weaves resist ladder-runs when scratched. Hold a photo up to mesh. Can you see it clearly, or is the weave tight enough to blur the image? If you see detail, the weave is loose. Loose weaves ladder (rip in a line) under sustained claw pressure.
Coating: Uncoated mesh frays and unravels after months of use. Polyurethane- or silicone-coated mesh holds its shape. Check by running a fingernail along the mesh edge. Does it stay put, or do fibers come loose? If you want to understand fabric strength, coatings, and thermal behavior, read our pet carrier material science explainer.
A: Seams are stress highways. A rigorous check:
A: The frame prevents your carrier from collapsing under pressure, critical if your carrier doubles as a safe perch in a car or on a luggage rack. Two designs dominate:
Ribbed plastic frame (most common): Thin plastic ribs inside the walls. When tested under sideways pressure, ribbed frames flex significantly and can crease. Acceptable for short trips, risky for frequent travel.
Aluminum or composite rod frame: Lightweight internal rods or a lattice structure. Resists torsion and maintains shape even if crushed against a seat. Adds 1-2 pounds, but dramatically improves durability. Cost premium is usually 20-40%, justified by frame longevity.
Practical test: Squeeze the carrier's side firmly. Does it yield easily, or does it push back with spring tension? Spring-back = better frame.
The challenge: maximize insulation while maintaining adequate ventilation. Solutions used by certified pet medical supply carriers:
A single carrier rarely handles both summer and winter optimally. Look for modular designs:
If your carrier lacks modularity, accept seasonal trade-offs or commit to separate carriers for high-temperature and low-temperature seasons.
Cheap foam and plastic emit volatile organic compounds (VOCs), especially when warm. These don't poison your pet, but they can contaminate the carrier's interior. If your insulin cooler is stored inside the carrier and the cooler isn't sealed, VOC contamination is unlikely but possible.
Look for:
Zippers, clips, and latches corrode if exposed to sweat, humidity, or repeated wetting. Stainless steel or anodized aluminum hardware is standard; cheap carriers use untreated steel, which rusts visibly within months. Inspect hardware for a shiny protective coating. Dull, gray appearance indicates unprotected metal.
Weak points fail where stress naturally travels first.
Before your trip, run a 15-minute simulation:
If internal temperature climbs more than 8°C above ambient, your insulation is inadequate for summer travel.
A diabetes-friendly pet carrier is not a luxury item, it's a medical supply. Durability and temperature stability are non-negotiable. Prioritize in this order:
Before buying, run the zipper test, count stitches per inch, and squeeze the frame. These hands-on checks take five minutes and reveal 80% of durability risk. A carrier rated by durability metrics (not brand prestige or aesthetics) will protect your pet, your insulin supply, and your peace of mind through hundreds of trips.
Don't learn through failure. Materials tell truths under load. Listen first.